
This ceiling was beyond repair and was replaced.

Oak riven laths were fixed to the joists with 40mm screws.

The replastered ceiling with 2 coats of lime plaster applied.

The laths on part of the ceiling were rotten and were replaced.

The stairwell ceiling being inspected, this area of the original ceiling was sound and was left in-situ.

A scratch coat of plaster applied to the new oak laths.

A matching top coat plaster was trialled in the workshop and in-situ, the arrow points to the sample approved by the Conservation officer. Note the plaster was matching the original colour of the plaster, not the existing ceiling colour which was dirt and soot affected.

The repaired stairwell ceiling.

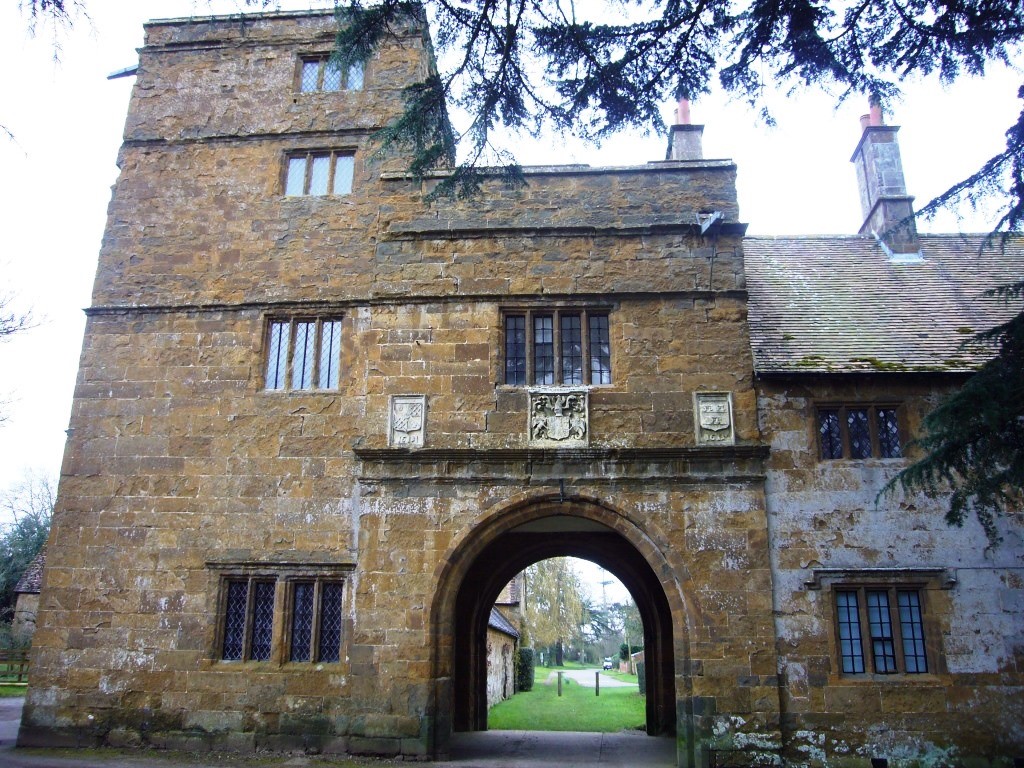
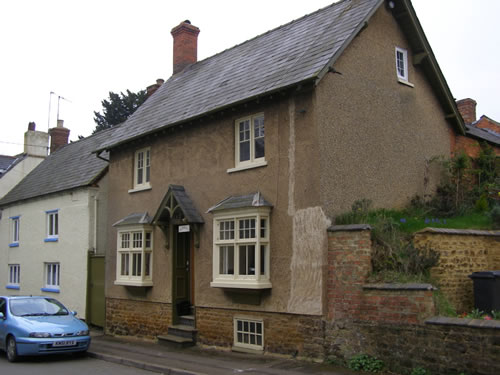
The cottage dates from the late 17th C and is possibly the oldest house in the village.

The cement render was cracking and was detaching itself from the cob.

The render was also failing in places and allowing moisture to enter the building

The cement based render partially removed.

The cement based rendering was removed to show the lower wall was of cob construction and the higher level was built with a modern breeze blocks.

Removing the cement rendering exposed a blocked doorway , possibly from when the house was two dwellings.

Removing the render revealed a patch of brickwork from a previous repair.

The bricks forming the window cill were taken down, numbered and then replaced in their original position.

The cob walling was damaged and missing at the side of the doorway.

The area was repaired using cob blocks. This area was quite deep so preformed blocks were used as opposed to wet cob.

The cob to the right of the door had been damaged by previous door alterations and required repairing.

The area was repaired using cob with straw. The cob used for the repair was recycled from an adjacent repair on the house.

Cob blocks used for a ground level repairs. Blocks were used as the ground level of the building could be subject to damp from the pavement, the blocks are denser than wet cob so would provide more resistance.

The void cut out for the new cob blocks to be bedded into. The white arrows show the top stones of the plinth that the cob wall stands on. This plinth should be approx. 450mm above ground level, so this maybe gives an indication as to how much the ground level has risen since the introduction of pavements and rising street levels.

The scratch coat of lime render was applied to the front elevation of the cottage.

The floating coat render being applied onto the damp scratch coat.

Even though the top of the wall was built with breeze blocks it received the same two coats of lime render.

Due to warm spring weather the render was protected from direct sunlight to control the setting of the render, it was also sprayed with water several times a day

The finished lime render, prior to decoration.

The finished work after decorating. Note new door.
. Limewash was not used due to the poor design of the front windows that allowed rain to pour down the front of the wall, limewash would be constantly washed away in these areas.")
Once the render had dried the wall was decorated with a breathable approved paint. (Keim). Limewash was not used due to the poor design of the front windows that allowed rain to pour down the front of the wall, limewash would be constantly washed away in these areas.

Modern plasterboard alterations had been removed to reveal the remains of the historic timber framed walling beneath. The timber frame was in good condition, some timbers showed signs of being used before, ie mortices from mortice and tenon joints. The sections of original plaster were either missing or in poor condition.

The Victorian fire surround was a later addition that connected with an historic chimney flue.

The original laths were riven oak and where still in place were in relatively good condition.

The original laths were riven oak and where still in place were in relatively good condition.
. New oak laths shown being fixed in an original timber groove (left side).")
Remnants of the original laths were still in place, but in poor condition ( right side). New oak laths shown being fixed in an original timber groove (left side).

Riven oak laths were fixed ingrooves in the vertical posts.

Two layers of clay render was applied onto the oak laths.

The remnants of the original lime render was conserved in place using Plaster of Paris to consolidate the edges and then clay render applied around the remains.

The sections had a lime rich top lime plaster applied as a finishing coat.

A similar exercise was carried out at higher level. The section on the left was the original lath and clay render. Note. the render was originally applied from the other side of the wall.

The new oak laths were fixed using copper ties as attaching them to the timbers would have resulted in losing original fabric.

A close up of the copper ties holding the laths in position.

Two coats of clay render were applied over the laths.

The finished section of lime rich top coat applied over the clay render.

The chimney flue was in a state of disrepair and no longer in use.

The brickwork cheeks were rebuilt in their original positions.

The fire surround was fixed to the brickwork using two 8mm stainless steel threaded bars. The bars were resined onto the back of the cast iron surround and built into the brickwork of the cheeks.

Once built the brickwork was rendered with a coat of lime render and a coat of lime rich top coat plaster.

The original plaster was based on two coats of a clay based render, most probably just clay and straw and a lime plaster top coat.

The same area replastered with lime rich top coat plaster; still drying.

All loose edges of existing plaster were consolidated in two coats against the timber frame.

The finished wall prior to limewashing and the decoration of the fire surround.

The finished wall after six coats of limewash.

The partition wall in between the bedrooms was a combination of timber frame construction with a possible bricked up doorway. The plasterwork was loose or missing around the edges of the timbers, the plaster was missing over the brickwork.

The surface of the existing plasterwork had been keyed to maybe act as a key for another surface finish. These key marks were plastered over to provide a flat surface.

Where on show the edges of the laths were more split branch type wattle/laths than riven oak laths. This area was re-rendered using a clay render, a coat of haired lime render and a plaster coat of lime rich top coat.

The central doorway was plastered over and the other surfaces were consolidated around the edges of the timber work. The key marks filled in with lime top coat plaster and sponged over.

As with the end wall all loose edges of existing plaster were consolidated in two coats against the timber frame. As the plaster dried the surface was finished with a sponge float to provide a slightly textured finish to provide an open surface suitable for the application of limewash. The photo shows the wall in various stages of drying out.

The finished wall after six coats of limewash.

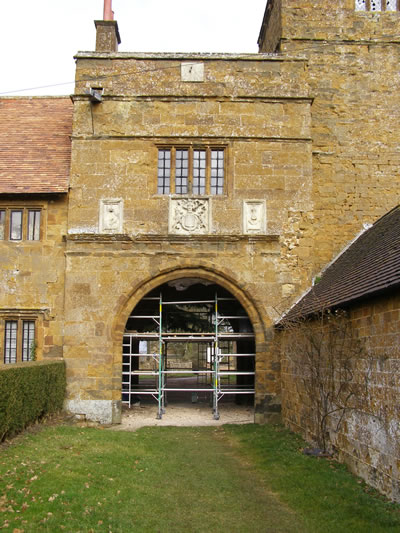
This house was converted from a cob barn in the 19th C. It has undergone lime plastering and rendering in recent times with cement render and has crude markings cut into the render before setting to mimic courses of stone! On top of the render a modern plastic paint had been applied. Both finishes were detaching themselves from the wall.

Some structural cracking was occuring in several places.
Note: chicken wire within render, peeling plastic paint and crude finish to render.
A conservation engineer surveyed the property before any lime plastering and rendering repairs were carried out.

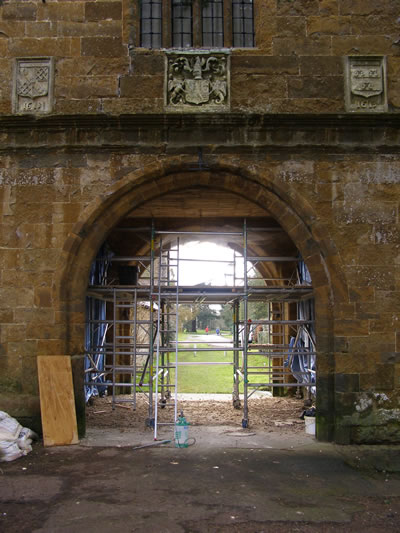
The plastic paint was blistering and detaching itself from the stonework as seen here. The stonework behind the paint was becoming friable and the mortar joints were crumbling!
This is a good example of why modern plastic paints should not be applied over historic fabric. The plastic paint had to be painstakingly removed from the whole elevation! To save excessive repointing a lime/aggregate slurry mix was applied over deep areas to act as a key for the new limewash.

Side elevation with majority of the cement render removed.The front elevation is stonework.

The cob walling stood on a stone plinth which had been rendered over. This allowed moisture to come into contact with the cob. The plinth should never be rendered over.

Two coats of lime render were applied onto the cob and followed the contours of the wall. The stone plinth remains exposed and will be pointed in lime mortar.

Due to the hot summer weather hessian sheeting had to be erected to prevent the lime plastering rendering drying out too quickly. This also served as a shelter when applying the three coats of limewash to the wall.

The front elevation of the property had been covered with a modern masonry paint. This was cracking and detaching itself from the fabric and the original mortar and stonework behind was deteriorating. it was not allowing the structure to breathe.

The front and side elevation of Oldways after three coats of limewash had been applied.

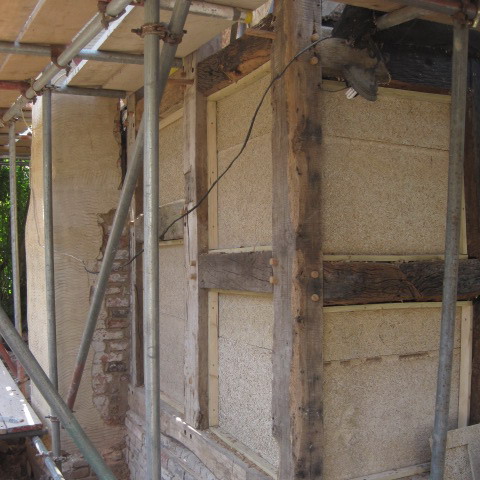
This timber framed house in the village has suffered from the use of inappropriate materials along side the historic timber frame. Heavy cement render over brick infill panels has inhibited the movement of moisture which has caused the timber to remain damp and slowly decay. The house was leaning on the end elevation from back to front which complicates the repair work. The initial plan was to remove the rotten elements and replace them with reclaimed English oak. The brick panels would not be replaced, but woodwool boards and sheepswool insulation will fill the panels which should achieve a superior U value. Then lime render and limewash will be applied to the internal and external surfaces.

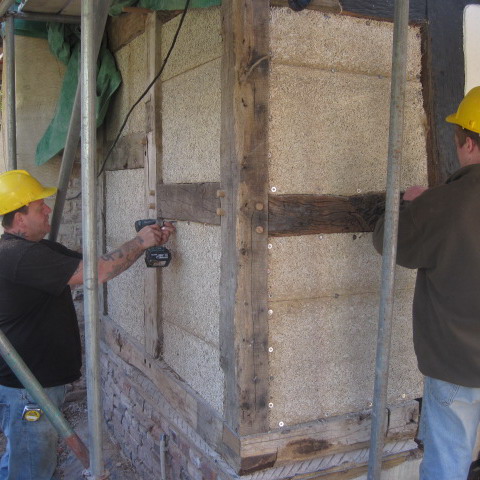
The brick panels are removed to reveal the extent of the problem.

Timber had previously been taken out and replaced with bricks and fake timber created by making lines in wet mortar and blacked over!

Once the majority of the brickwork had been taken out the full extent of the decay of the timbers could be seen.

The end elevation of the house mid project! All the brick panels have been removed and the cement render has been removed from the brick chimney stack. The majority of the timbers in the photo have still to be taken out as they were too rotton to leave in place

The completed work! Out of the 34 individual timbers on the end elevation of the house 29 were replaced. The chimney stack was taken down half way and rebuilt. The woodwool panels were rendered with three coats of non hyrdaulic lime render and the chimney stack was rendered with three coats of hydraulic lime render. All areas were then limewashed with a casein based limewash.

This Grade II timber framed Listed Building had been re-rendered in the 1980's with a cement render!! This had cracked when the structure seasonally moved, these cracks then let water into the structure and into the property.

Cracks and removed cement render.

Loose brick panels prior to repair.


A haired lime base coat is being applied to the laths

Three coats of limewash have been applied to the the finished work